This article may contain affiliate links. If you buy through them we may earn a commission at no extra cost to you.
Upgrading laptop RAM takes 20–40 minutes, costs $30–150 per module, and can meaningfully extend a machine’s useful life—provided your laptop doesn’t have RAM soldered to the motherboard. Many ultrabooks and all MacBooks from 2016 onward do. Check that first; everything else follows from it.
Check if Your Laptop’s RAM Is Upgradeable
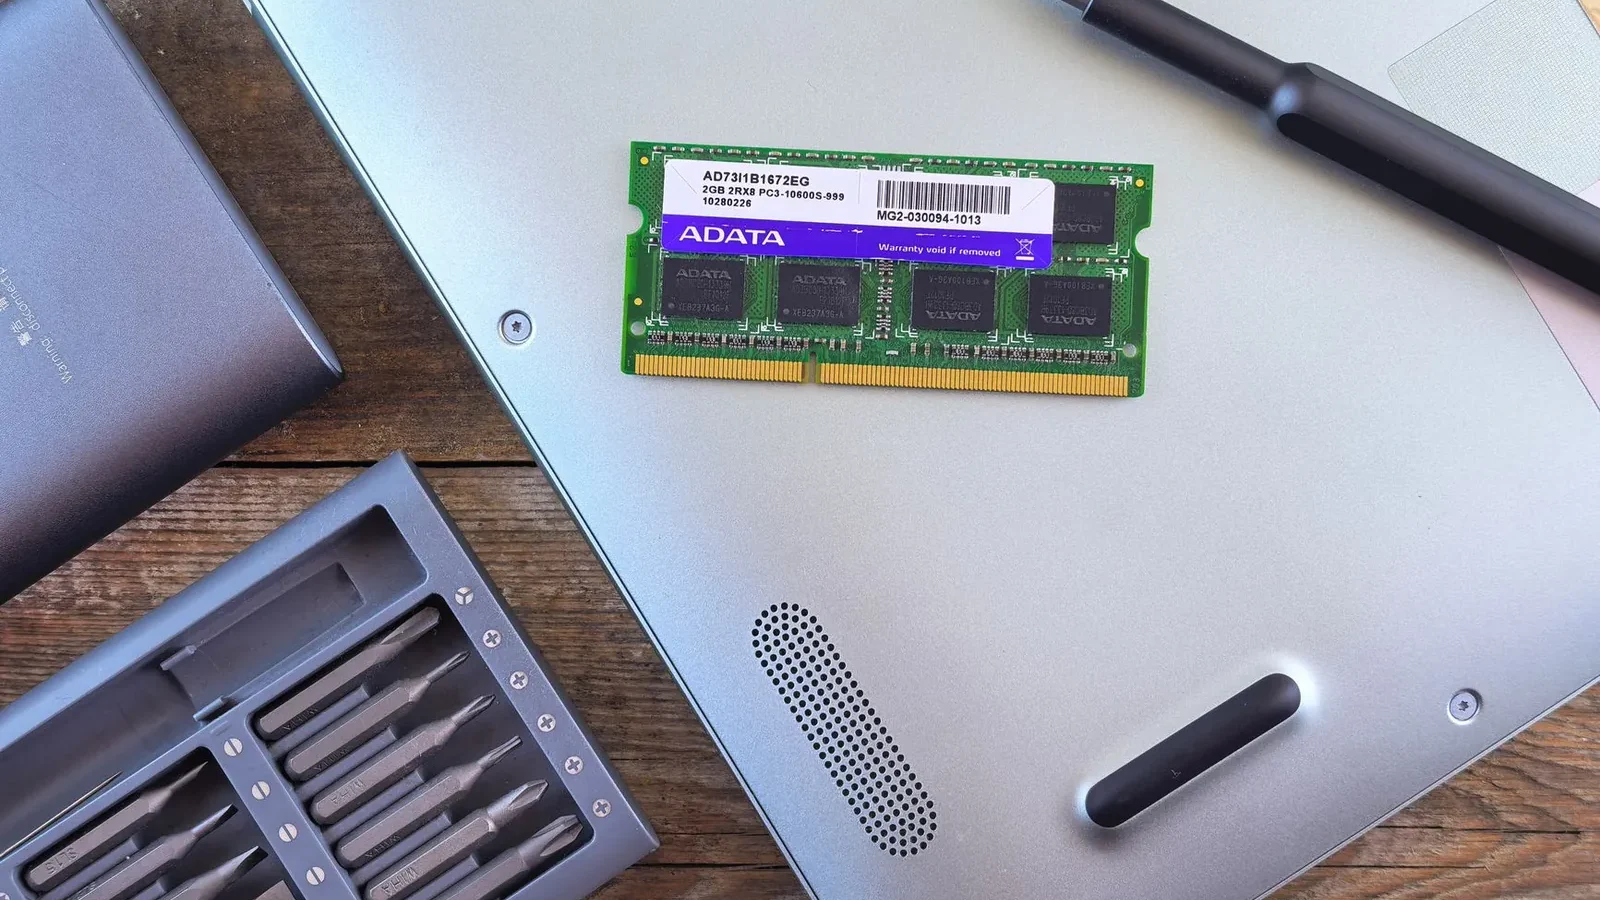
Soldered RAM is permanent. You’ll find it in most thin-and-light ultrabooks, every Apple Silicon Mac, and a growing number of budget laptops. Upgradeable laptops have physical SO-DIMM slots under a removable panel—usually one or two slots, sometimes with one already occupied.
How to find out
- Search “[your exact model] RAM upgrade” on the manufacturer’s support page or in the printed manual.
- Check iFixit.com—they rate repairability for thousands of models and include disassembly photos showing whether slots exist.
- Open the bottom panel yourself if you’re willing to accept any warranty implications: you’ll see either empty SO-DIMM slots or chips soldered directly to the board.
If slots exist, note how many are occupied. One occupied slot in a two-slot laptop means you can add one more stick without removing anything. Two occupied slots means you must pull the existing modules to install larger ones.

Identify Your Current RAM Type and Capacity
RAM generations—DDR3, DDR4, DDR5—are physically incompatible. A DDR5 module won’t seat in a DDR4 slot. Mismatched speeds within the same generation do work, but the faster module drops to match the slower one’s speed.
Find your specs using software
- Windows: Run the free CPU-Z utility and click the Memory tab. It shows type, speed in MHz, and total capacity.
- Mac: Apple menu → About This Mac → Memory. Displays type and speed clearly.
- Linux: Run
sudo dmidecode --type memoryin terminal.
Write down the exact result—for example, “DDR4-3200.” Buying DDR4-2666 for that slot works but runs at 2666 MHz. Buying DDR5 for that slot doesn’t fit at all.
Check maximum supported capacity
Your motherboard has a hard ceiling—commonly 16 GB, 32 GB, or 64 GB. Installing 64 GB in a laptop rated for 32 GB means one module simply won’t be recognized. Confirm the limit in your manual or on the manufacturer’s support page before ordering.
Choose Your Replacement RAM
Crucial, Kingston, and Samsung are the most widely available brands with consistent compatibility. Prices as of mid-2026:
| Module | Typical use case | Price range |
|---|---|---|
| 8 GB DDR4-3200 | 2015–2019 laptops, light workloads | $30–45 |
| 16 GB DDR4-3200 | Multitasking, modern general use | $50–80 |
| 16 GB DDR5-5600 | 2022+ laptops with DDR5 slots | $70–120 |
If both slots are empty, buy a matched kit (two identical modules) rather than two separate sticks. If one slot is already occupied, buy a single module matching the installed type and speed exactly.
Mixing RAM brands works fine as long as type and speed match; matching brands and models just reduces the small risk of incompatibility.
Gather Tools and Prepare Your Workspace
You need four things:
- A Phillips-head screwdriver—size #0 or #1 depending on your laptop’s screws.
- An anti-static wrist strap ($5–10). A static discharge can silently damage a module or the slot itself.
- A clean, flat, well-lit surface.
- Your new RAM module(s).
Power the laptop off completely—not sleep, not hibernate. Unplug the charger and wait 30 seconds for residual charge to dissipate. Remove the battery if it’s user-removable; if not, powering off is sufficient.

Remove the Bottom Panel and Locate RAM Slots
- Flip the laptop upside down on a soft cloth to protect the lid.
- Find the access panel—often labeled “Memory” or simply the largest removable panel on the underside.
- Remove all screws and store them in a small container. Laptop screws are often different lengths; keeping them grouped by location saves time on reassembly.
- Lift the panel away. If a ribbon cable connects it to the chassis, disconnect it carefully before setting the panel aside.
- Locate the RAM slots—long, thin, horizontal connectors with a retaining clip at each end.
Some laptops have no discrete access panel and require removing the entire bottom cover. If that’s your situation, find your model’s iFixit teardown before proceeding—the screw count and hidden clip locations vary significantly.
Remove Old RAM (If Necessary) and Install New Modules
To remove an existing module, push both end clips simultaneously outward. The module springs up to roughly 45 degrees. Grip it by the edges—not the chips or contacts—and pull it straight out.
To install the new module:
- Align the notch on the module’s contact edge with the key in the slot. This prevents backwards insertion.
- Slide the module in at a 45-degree angle until the contacts are fully seated.
- Press the module flat toward the motherboard until both clips snap closed. You’ll feel and hear a click on each side.
- The installed module should sit level and flush. Any tilt means it isn’t fully seated—remove it and try again.
Never force a module. If it doesn’t slide in smoothly, stop and recheck the notch alignment. Forcing can crack the slot or bend the contacts.
Reassemble and Verify the Upgrade
Reconnect any ribbon cable, replace the access panel, and reinstall the screws. Power the laptop on and let it boot normally.
Open your system info tool—CPU-Z on Windows, About This Mac on macOS—and confirm the new total. If you added a 16 GB module to a machine that had 8 GB, you should see 24 GB. If the new capacity doesn’t appear, power off, reseat the module, and boot again.
Then run a memory diagnostic:
- Windows: Search “Windows Memory Diagnostic,” run it, and let it complete after the required restart.
- Mac: Restart, hold Command+D, and run Apple Diagnostics.
A passing result means the upgrade is complete. A failure usually points to a faulty module—try reseating it once, and if it fails again, return it under warranty.
If you’re working on an older machine, also consider other speed improvements: replacing a spinning hard drive with an SSD typically has a larger impact on everyday responsiveness than a RAM upgrade alone.
Common Mistakes to Avoid
- Buying the wrong generation: DDR4 and DDR5 are not interchangeable—the notch position differs. Confirm your type before ordering.
- Skipping the anti-static strap: A $5–10 strap insures against a $50–150 loss. Alternatively, touch a bare metal part of the chassis before handling any component.
- Forcing the module: Smooth insertion only. Resistance means misalignment, not insufficient pressure.
- Mixing speeds carelessly: Pairing DDR4-3200 with DDR4-2666 drops both to 2666 MHz—functional, but you’ve paid for speed you won’t use.
- Exceeding the motherboard’s capacity limit: Installing 64 GB in a 32 GB-max laptop leaves half your RAM unrecognized by the system.
Before buying, check our guide on how much RAM your workload actually requires to avoid over-spending on capacity you won’t use.
Frequently asked questions
Can I upgrade RAM on any laptop?
No. Ultrabooks, MacBook Air models from 2016 onward, and many thin gaming laptops solder RAM to the motherboard. Check your manual or iFixit before assuming slots exist. If RAM is soldered, no upgrade is possible.
What happens if I install RAM with the wrong speed?
Installing faster RAM—say DDR4-3600—in a slot rated for DDR4-3200 causes it to run at 3200 MHz. Installing a slower module alongside a faster one drops both to the slower speed. No damage occurs, but you won’t see the performance benefit of the faster module.
Do I need an anti-static wrist strap?
Not strictly, but static discharge can permanently damage RAM or the motherboard slot without any visible sign. If you don’t have a strap, touch a bare metal section of the laptop chassis immediately before handling any component to discharge built-up static.
How long does a RAM upgrade take?
20–40 minutes for laptops with a dedicated memory access panel. 45–90 minutes if you need to remove the entire bottom cover. Most of that time is careful screw removal and reinstallation, not the RAM swap itself.
Will upgrading RAM void my warranty?
It depends on the manufacturer’s terms. Some explicitly allow user RAM upgrades; others—Apple included—may refuse warranty service on a laptop that’s been opened. Read your warranty document or contact support before opening the case if coverage matters to you.

Lena writes about smart home, audio and the software settings nobody reads the manual for.